Tuesday, January 10, 2023

Tips & Tricks Tuesday #9 - Coloring Stamped Images and Shapes

During last weekend's Ready Set Crop Winter Wonderland Retreat that I was a vendor at I did a short technique talk on coloring in stamped images and shapes to customize these for your scrapbook layouts or cards. I love being able to create my own embellishments that coordinate perfectly with a project I am working on.


I talked about 4 different ways to color in your stamped images and shapes and will share some information on each of these along with some tips I have learned along the way with this post.

1. Watercolor Pencils


To work with the Watercolor Pencils you would color in the stamped image with the pencil colors you want. The more pressure you use when coloring with the pencil the deeper the color will be on the image. After coloring then go over with either a water brush or paint brush with some water. This will "smooth out" the pencil lines and blend the colors. I recommend coloring the image fully before applying any water to the paper.

2. Watercolor Paints

You can mix the various watercolor paints together to get the shades you want. I use the "wells" on the lid to do my mixing before I color my images with these. The watercolor paints give a more "chalky" look to the colors.

3. Ink

To color with ink from your ink pads you would gently squeeze the closed ink pad to transfer some ink to the inside of the lid. Use your water brush to pick up the ink and color your stamped image.

4. Triblend Markers

The Triblend Markers from Spectrum Noir are great for coloring images as well as shapes. You can easily blend the various colors together. Each marker has a light, medium and dark shade. You can use the shades to blend in the lines between the different colors to soften the lines.

Tips for Coloring:

1. Use a solvent-based or archival ink to stamp your images. If you use a dye-based ink in stamping, when you go to color the stamped image the ink will bleed. I use the Intense Black Exclusive Ink from Close To My Heart when I stamp my images. This is a solvent-based ink.

 2. Use the water sparingly as too much will cause the paper to start to "pill" and the colors to become muddy.

3. Wipe off your water brush on a paper towel in between working with each color to not transfer one color to another area.

4. When using watercolor pencils it works best to color in all areas before using the water brush as you will not be able to apply another color over an area where the water brush has been used with the paper potentially tearing.


In addition to the technique talk I taught 2 scrapbook layout workshops where I incorporated using watercolor pencils in coloring in elements of the layout as well as the embellishments. For the "Our Getaway" layout we colored in the stamped border strips below the photos. The owls on the "Life's A Hoot" layout were also colored in with the watercolor pencils.


I hope you learned something from this post. Thanks for stopping by!

Supplies list:

- Intense Black Exclusive Ink

- Watercolor Pencils

- Watercolor Paints

- Small Round Water Brush

- Medium Round Water Brush

- Watercolor Paper

- Triblend Markers

Saturday, January 7, 2023

Life's A Hoot Layout

This is the layout from the second workshop I taught during this weekend's Ready Set Crop Winter Wonderland retreat. This layout features the Life's A Hoot collection from the January/February/March catalog.

The base layout design comes from this sketch from the Close To My Heart blog. You can see this sketch along with others here


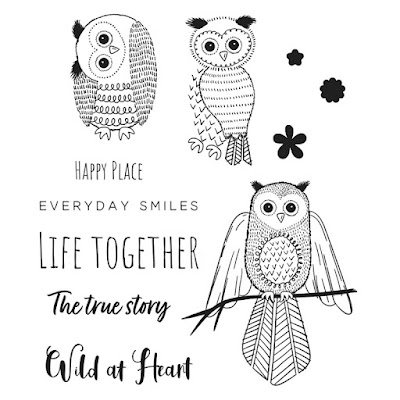
I changed up the sketch and added a background piece cut with my Cricut from the Digital Art Collection that coordinates with the Life's A Hoot collection. I also added a Cricut cut title and some leaves from the same collection. The owls were die cut from the Life's A Hoot Scrapbooking Stamp Set + Thin Cuts. I stamped the images in Intense Black Exclusive ink and then used Watercolor Pencils and a Water brush to color them in.


I enjoyed working with the stamped images in creating the embellishments for this layout. There are so many possibilities for coloring in stamped images to coordinate with any layout.


I love the Digital Art Collections that coordinate with the Close To My Heart paper collections. You can take the various SVG images and mix and match them to work with any layout.


You can see and shop the whole Life's A Hoot Collection on my website - here.

I hope you like the layout. Thanks for stopping by!

Valentine's Hexagon Explosion Treat Box Tutorial and Process Video

I am so excited to share this treat box with you today! I created this explosion box to hold some treats for my coworkers for the upcoming Valentine's Day. The box features the Now & Forever Collection which is a current special from Close To My Heart.


I am including a link to a downloadable PDF with instructions as well as a process video at the end of this blog post. The PDF contains cutting diagrams along with more detailed instructions on the cutting, preparation, and assembly of this treat box.

Cut cardstock for large box into 4 6" x 5 1/4" pieces for hexagons, 6 3" x 3 1/2" pieces for bottom sides, 6 3 1/2" x 1 1/2" pieces for the lid sides, and 6 4 1/4" x 3" pieces for the pockets.


Cut cardstock for the medium box into 4 4" x 3 1/2" pieces for hexagons, 6 2" x 2 1/2" pieces for bottom sides, and 6 2 1/2" x 1 1/4" pieces for the lid sides.


Cut the cardstock for the small box into 1 5 1/4" x 5 1/4" piece for the box bottom and 1 2 7/8" x 2 7/8" piece for the box lid.


Using a pencil and ruler or grid mat mark the long and short sides of the cardstock pieces for the hexagons. Align the marks with your trimmer cutting line to cut 4 corners off each piece to make the hexagons.


Score at the 1/2" mark on the 3 1/2" side of each box base side piece. Score at the 3" mark on the 3 1/2" side of each box lid side piece and then at the 1" mark on the 1 1/2" side. Score at the 1/2", 1", 3 1/4" and 3 3/4" marks on the 4 /14" side of each pocket piece and then at the 1/2" and 1" marks in the 3" side. Fold all along the score lines. Cut away the bottom right tab on the lid side pieces and the 2 bottom tabs on the pocket pieces. 


Score at the 1/2" mark on the 2 1/2" side of each box base side piece. Score at the 2" mark on the 2 1/2" side of each box lid side piece and then at the 3/4" mark on the 1 1/4" side. Fold all along the score lines. Cut away the bottom right tab on the lid side pieces. 


Score at the 1 3/4" and 3 1/2" marks on two sides of the small box base piece. Score at 1/2" and 2 3/8" on two sides of the small box lid piece. Fold along the score lines then cut in along one score line on each side of the base and lid pieces to create tabs.


Place strong adhesive tape on the tabs on each of the scored pieces along with 2 of the hexagons for each box size.


Beginning with the large box, remove the adhesive backing from each tab on the 3" x 3 1/2" box base side pieces, adhere each one to the box base hexagon aligning the fold line with the side of the hexagon. Adhere one hexagon on the inside to cover the tabs.


Create a chain with the lid side pieces by adhering one next to the other using the small tabs. Working around the box lid hexagon adhere the chain by aligning the fold line with the side of the hexagon. Tuck the last tab in behind the first piece. Adhere the other hexagon on the inside to cover the tabs.


Create the pockets by folding the outer tabs in and adhering to the next tab then folding this in and adhering to the next tab. Once the "pocket" is created adhere this to the inside of each side of the box keeping it about 1/4" above the bottom fold line.


Follow the same above steps for the medium box to assemble the base and lid.


Create the small box by adhering each tab behind each side to create the box base and lid.

Adhere the medium box inside the large box and then the small box inside the medium box to create the explosion "stack".

Decorate the sides and lid with patterned paper, stamped images, and embellishments. Fill it with some candy or other treats and send some love to someone!

Click here for the downloadable PDF of instructions. You can also watch the process video below.


Supplies list:

CC12222 - Now & Forever Paper Pack

CC12223 - Now & Forever Coordinating Cardstock Pack

CC12225 - Now & Forever Stamp Set + Thin Cuts

CC12226 - Now & Forever Embroidered Embellishments

Z5024 - Adhesive Tape

I hope you enjoy using these directions to share some holiday treats!

Thanks for stopping by!

Friday, January 6, 2023

Our Getaway Layout

Sharing a layout I did at a recent workshop at the Ready Set Crop Winter Wonderland weekend. This layout features the Are We There Yet Collection that is part of the January - March Catalog from Close To My Heart. I loved working with the papers in this collection. The fun colors and patterns are going to be perfect for many of our travels.


The base layout design comes from this sketch from the Close To My Heart blog. You can see this sketch along with others here


I changed up the sketch a little and instead of 2 1/2" tall pieces below the large background piece I used a 1" tall piece that I stamped with the Are We There Yet Borders Stamp set and colored in with Watercolor Pencils. I also added some stamped from the Are We There Yet Scrapbooking Stamp set for the title and other embellishments.


It is fun to incorporate stamped images in your scrapbooking whether using a set made for scrapbooking or for cardmaking there are so many possibilities for creating your own embellishments.


Are We There Yet Scrapbooking Stamp Set

Are We There Yet Borders Stamp Set

You can see and shop the whole Are We There Yet Collection on my website - here.

I hope you like the layout. Thanks for stopping by!